
Beyond the Frame 24/
In this Lightroom tutorial, I explain how you can apply dynamic noise-reduction settings to all images, regardless of exposure settings or ISO, with a one-click preset.

Adventures in Noise
I’ve been searching my Lightroom catalogue for images with unexpectedly, eye-wateringly high, ISO ratings.

This photo of the Bangkok Skytrain at sunset is almost the highest at a whopping 16,000 ISO.
The record, however, is held by these two frames, weighing in at an impressive 25,600 ISO.

There was a time when I’d get a nose bleed loading an ISO 800 film. Times have changed.
Whilst the latest camera technology has undoubtedly granted us a dizzyingly wide range of ISO speeds to play with, the higher ratings are still compromised by a “random variation of brightness or colour information”. That’ll be “Noise” to you and me.
This tutorial shows how I deal with noise (Rapidly and without mercy).
Warning: Tutorial includes a bar chart and laboured, step-by-step instructions. But the ability to transform all your noisy images with a single click will make it worthwhile.
As always, I stand by, awaiting questions, comments and polite suggestions.
Adaptive ISO
How to create a one-click solution for noise.
Grain v Noise
Grain is the word used to describe the pattern of tiny, random speckles in film. Noise is a similar effect found in digital images. That’s a wild oversimplification but, should you be so inclined, a quick search will reveal mountains of detailed scientific explanations.
We’re concerned with the practical implications and it’s sufficient for our purposes to know that they exist, and that both film grain and digital noise become more noticeable as the ISO speed increases.
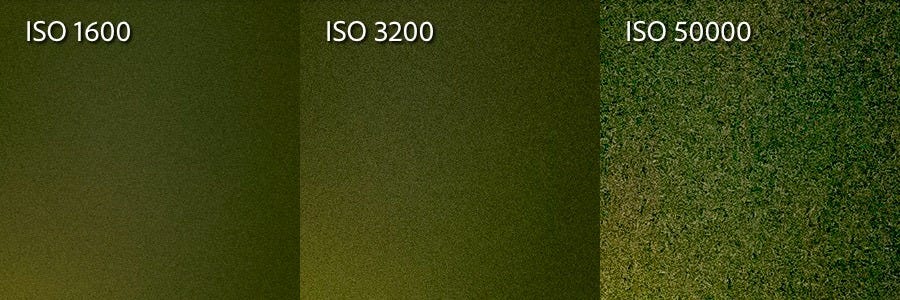
Digital “noise” in images with different ISO ratings.

In the good old days, grain was simply a fact of life. When we used film stock with a higher ISO rating, we accepted that the grain would be more noticeable. The “Grainy” film look is now sometimes purposely introduced to digital images in order to simulate a film “look”. Lightroom even has a setting in the Effects section where Grain can be introduced. What a time to be alive.
Digital Noise, however, is not afforded the same nostalgic leeway.
Grain = good. Noise = bad.
AI Denoise
Last week we looked at Adobe’s recommended sequence for processing images.
Adobe’s Recommended Order of Operations
Denoise
Content-Aware Remove/Heal/Spot
Lens Profile Corrections (CA and Profile, if available)
Profile
Global Adjustments
Local Adjustments
Denoise appears first in Adobe’s list because the AI Denoise process creates a duplicate DNG file. There’s little point making any adjustments to the original, which may be lost or compromised in the duplicate.
You’ll find the Denoise button in the Develop module, inside the Detail section.

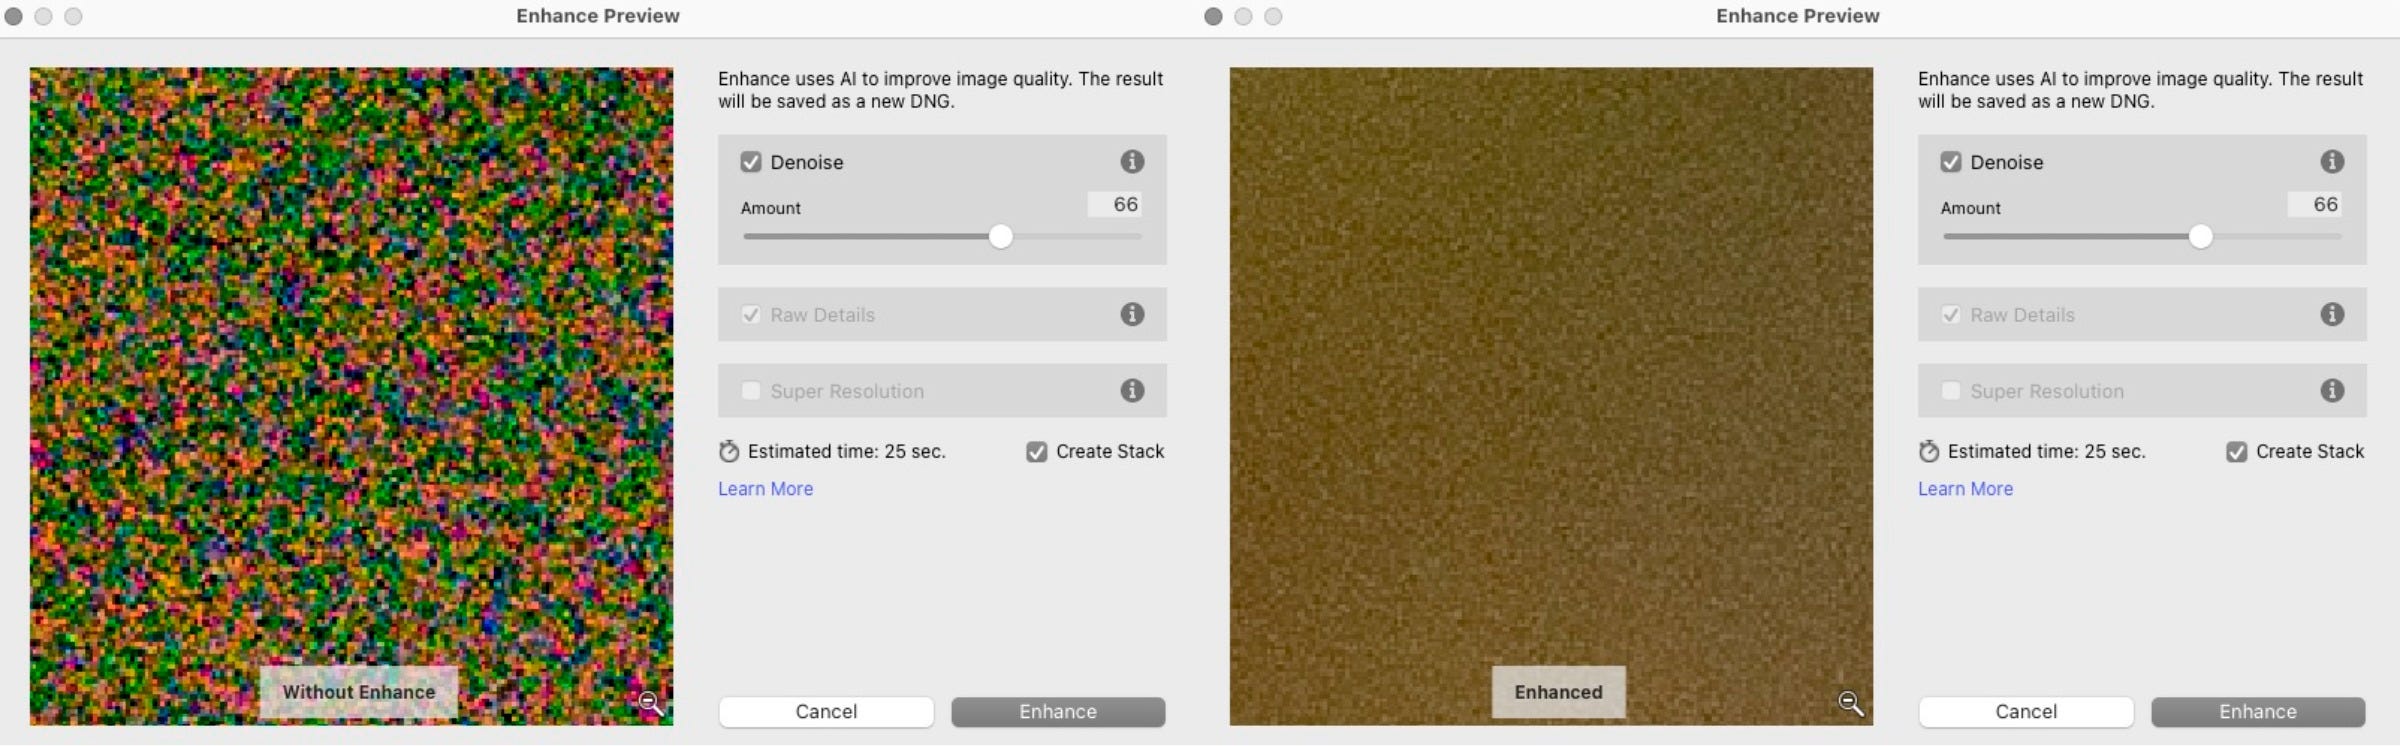
Click the Denoise button
A window appears with a close-up preview of the Enhanced version
Manually adjust the slider for the best result
Click and hold on the large preview window to compare before/after
Click [Enhance], a duplicate DNG file is created and stacked with the original
Denoise AI - A Caveat
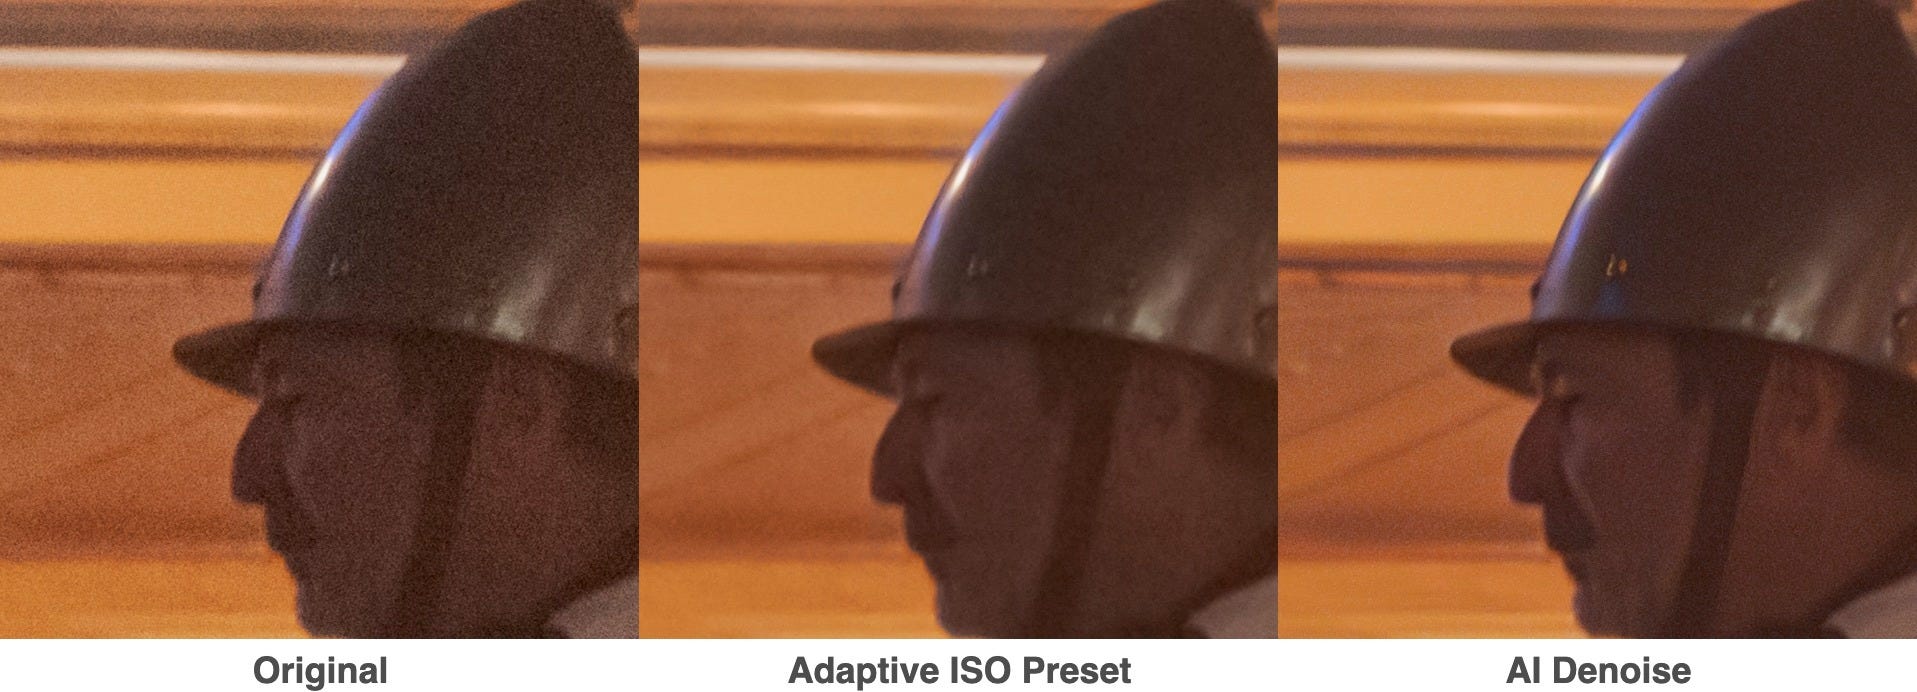
At first glance Denoise is an impressive tool. However, I’ve found that it can create an unnaturally smooth texture, especially on faces. I think it’s best used sparingly at low levels. Better to live with a certain amount of noise than make your portrait subjects look like actors in a Korean soap opera (Mrs. G. has been watching a lot of Korean TV recently).
Manual Noise Reduction
As in so many things, I favour a more Old School approach. I manually adjust noise reduction levels without the need to create a duplicate file.
In addition, this approach creates a preset that can be applied to multiple images at the same time. Even if they have different ISO ratings.
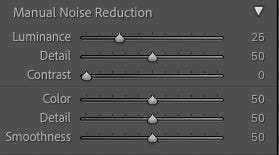
There are, essentially, two types of noise: Monochrome (Luminance) and Colour. The top three panels affect Luminance Noise, the bottom three control Colour Noise reduction.
Top Tip
Hold the [Alt] key down whilst moving a Luminance slider, colour is removed, making it easier to preview the effect of each slider.
Luminance Noise
Move the Luminance Slider to the right to see noise reduced. Don’t go too far. As Noise disappears it can take detail with it.
Moving the Detail slider to the right retains more detail. I think of it as fine-tuning the Luminance slider.
Similarly, the Contrast slider should be used to recover contrast that the Luminance slider might have reduced.
Essentially, it’s a three-way balancing act. Get the Luminance level right, then use Detail and Contrast adjustments for fine-tuning.
Colour Noise
The Colour sliders work in the same way but, to state the obvious, they control the levels of Colour Noise in the image. Obviously the [Alt] key trick won’t work with these sliders.
A One-Click, Adaptive Noise Reduction Preset
So that’s how we manage noise reduction in a single image. However, manually adjusting all six settings for every image would be a pain in the you-know-what.
This is how I made an Adaptive Noise Reduction Preset:
I made a series of images of a tree at different ISO settings. Horse Chestnut, since you ask.
Tree foliage is a good subject for this, providing both shadows and highlights, but any subject that provides contrast would work.
I purposely defocussed so that the noise would be easier to see. I used Aperture Priority mode and set an exposure of -1/3 stop to darken the shadows a smidge (technical term for a small amount).

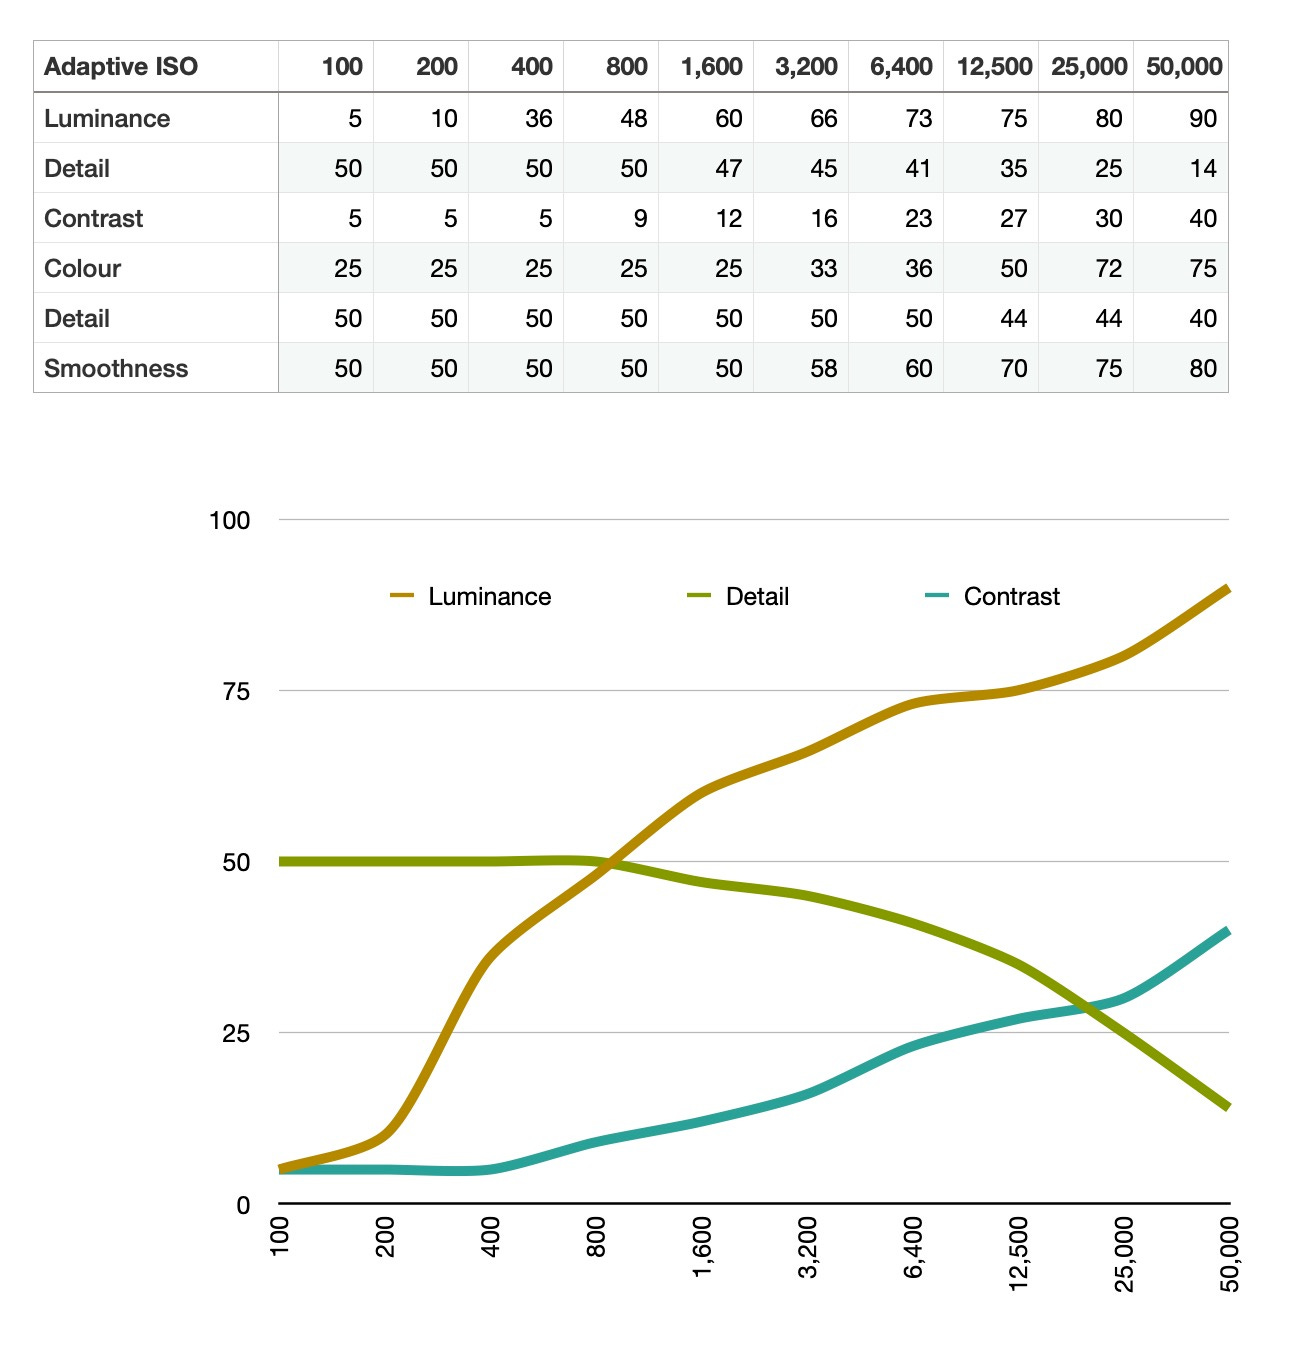
I manually adjusted the Noise Reduction levels for ten of the images at one-stop intervals: ISO 100, 200, 400, 800, 1600, 3200, 6400, 12500, 25000, 50000.
How to use the Detail section
Zoom the image to 100% in order to see detail clearly.
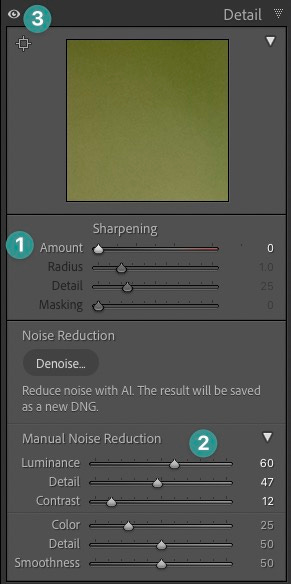
Reduce any pre-existing Sharpening to 0
Adjust sliders to reduce noise to optimum levels without losing too much detail or contrast
Click and hold the eye icon to toggle the Detail section off and on for before/after comparison
These are the Noise Reduction levels I used (with a chart because anybody who’s still reading at this point is definitely the sort of person who will appreciate a nice chart.)
Create a Preset
Now the best bit:
Select all of the images that you’ve made Noise Reduction changes to.
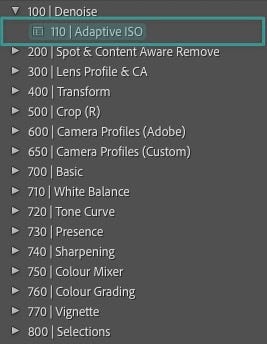
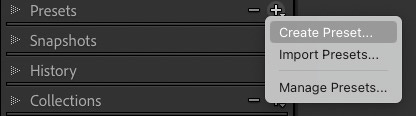
Click the Plus icon beside Presets, Create Preset…
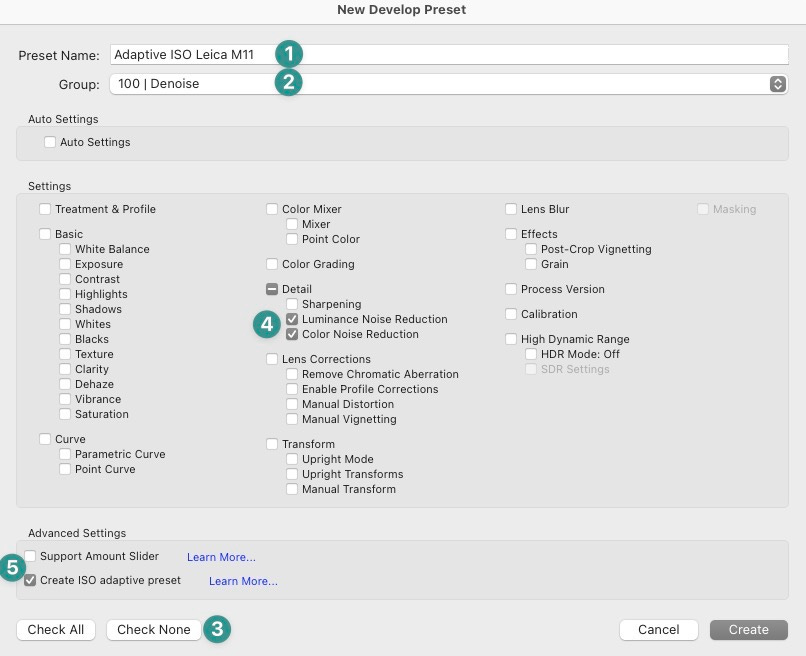
Name the preset
Add to a group if necessary
Check None to remove all existing checkmarks
Tick Luminance Noise Reduction and Colour Noise Reduction
Tick Create ISO adaptive preset
Test the Preset
This preset is the first I apply when processing and I use it by default on all images.
The preset will apply noise reduction levels based on the range of settings you provided.
Test it by applying the preset to different images with various ISO ratings. The ISO does not have to exactly match one in the range you used to create the preset.
I don’t make many photos with high ISO ratings but a test with this photo shows that the preset is doing its job.

With this preset in place, you never need to manually adjust Noise Reduction settings again. One click. Done.
Different cameras produce different levels of noise so I recommend making a different preset for each model.
If you happen to own a Leica M11 or Canon R3, you can download my Adaptive ISO presets from my website.
The password is “marmite”.
If you make a preset for a different camera and are happy to share it, forward it to me and I’ll add it to the page.
I hope you have a wonderful, noise-free weekend.


Beyond the Frame 23/

It is, I fear, the end of summer. The day started with blue skies and sunshine but I could see hints of ominous clouds forming over the Alps. So I walked to the lakeside, found a table with a good view of the Jet d’Eau fountain and enjoyed the last of the sunshine before the storms arrived.

