
Pushkar Camel Fair Lightroom Guide – Beyond the Frame 6/
Pushkar Camel Fair & a Guide to Lightroom Imports

On assignment in Rajasthan, northern India, documenting the annual Pushkar Camel Fair (Kartik Mela), I was looking for images of Camel Traders for a travel magazine article.
Ambient sound recorded on the Pushkar Camel Fair camp ground.

A Travel Writer colleague compiled the words, leaving me free to make images. This division of labour between writer and photographer is a lot less common these days. Travel journalists are often asked to provide words and pictures, although I notice that pay rates have not doubled!
The Pushkar Camel Fair is one of the largest animal trading fairs in the world. Camel owners travel great distances during the full moon month of Kartik with their stock, set up camp and spend days trading back and forth.
It’s also a religious festival with pilgrims taking a dip in the holy Pushkar Lake, with many religious rituals and performances. It’s not the place to go if you’re looking for a quiet retreat.
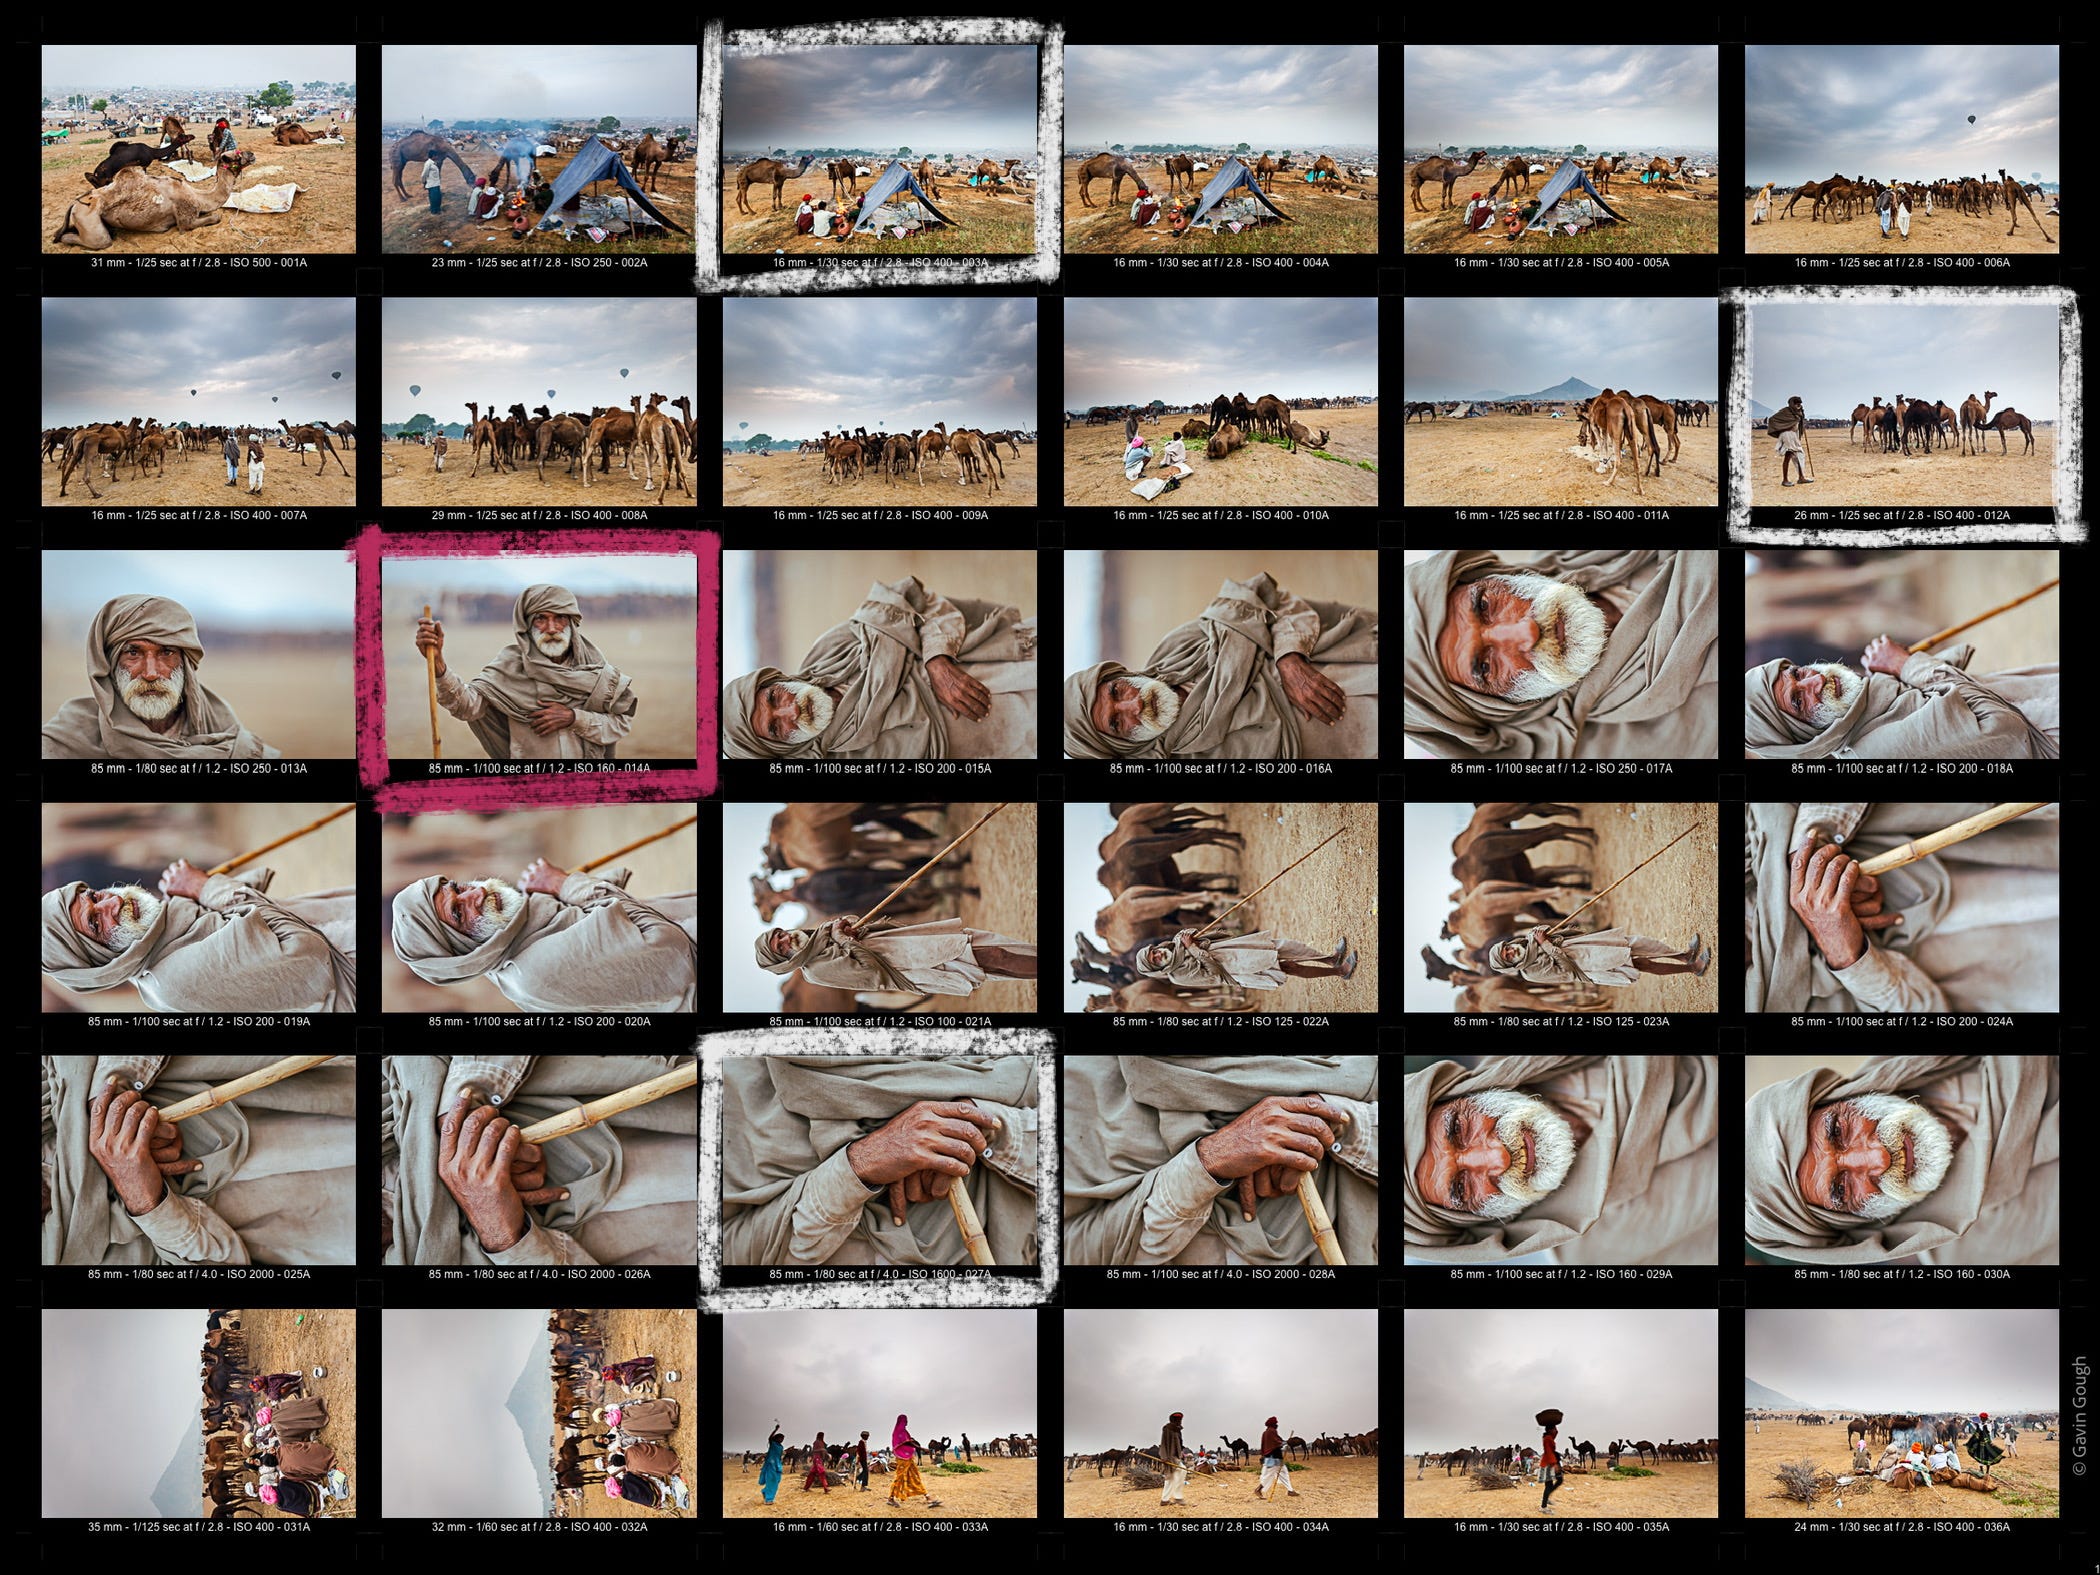
My contact sheet reveals that I was carrying, as is often the case, two cameras. A wide angle 16–35mm f/2.8 on one and the second with an 85mm f/1.2 attached. The first for scene-setting images to provide context. The second for portraits and close-ups, such as the camel trader’s hands and walking stick.

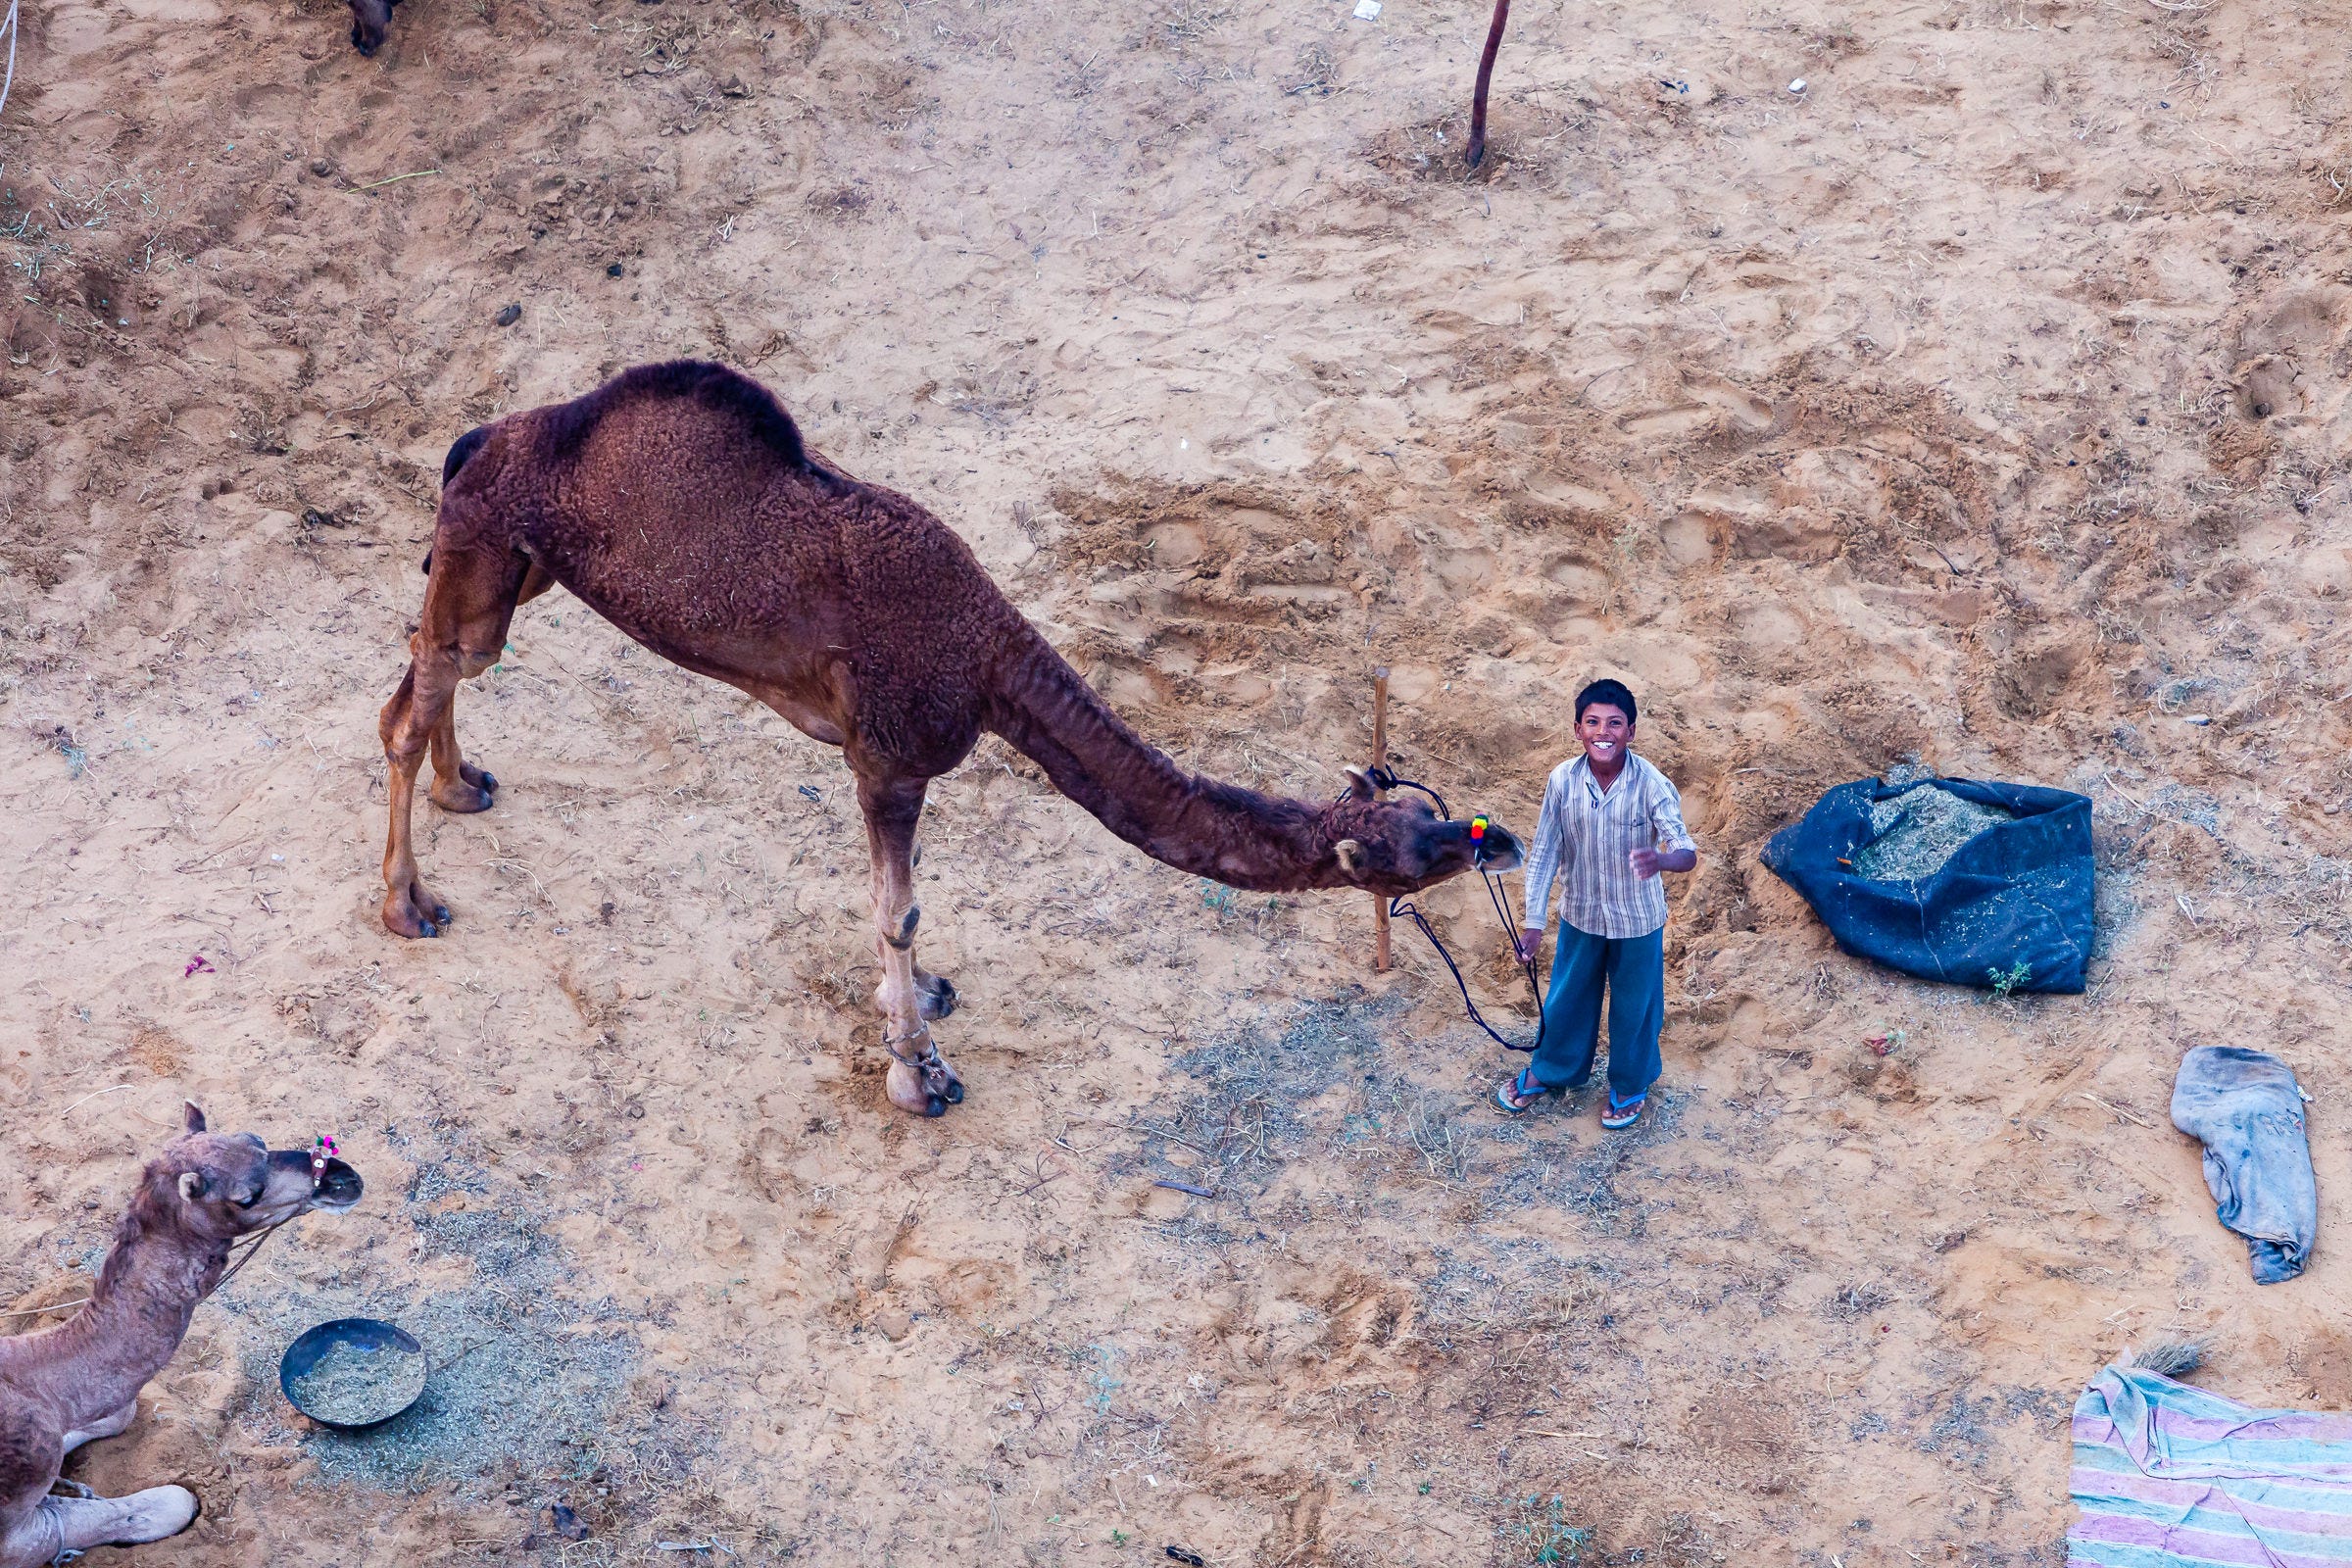
An early-morning hot air balloon ride above the camp grounds provided some unusual perspectives.
I’ve documented the Pushkar Camel Fair several times and it’s always been a memorable experience. This year the Fair will take place between the 9th & 16th November but if you’re thinking about visiting, I’d recommend going the week before the official dates.
You can find more information on the Vacation India website.
Lightroom Workflow Guide — Ingesting/Importing
I’ve been using Lightroom since v1.0 appeared in 2007. Since then I’ve built and fine-tuned a workflow that allows me to process and edit images in an efficient and consistent way.
In the coming weeks, I’ll break-down my workflow and explain how I use Lightroom’s functionality to achieve a consistent approach.
Importing
It’s worth pointing out a golden rule. When image files have been imported into Lightroom, the actual files exist in the locations you specify. Lightroom simply creates a reference to each file. The image files do not exist within Lightroom.
For that reason, it’s really important that we only use Lightroom to manage image files that Lightroom has referenced. We can use Lightroom to edit, rename and manage files so it provides all the management tools we might require.
If we move, delete or rename files outside of Lightroom, the database link will be broken and we’ll see error messages saying, “This file cannot be located.”
So remember, after importing, only use Lightroom to manage image files.
(There are some caveats, e.g. you might edit metadata in another application, such as Photo Mechanic, but changes must be synchronised between applications. Generally speaking, sticking exclusively to Lightroom is a good practice.)
The Import Window
This is where a consistent approach begins. There are several options to set up. Fortunately, Lightroom has templates, which allow us to store settings for future use. So once set up, importing can be pretty much a one-click process (Literally two or three clicks but you get the point).
Preferences

In Preferences > General, you will find an option to automatically show the import window when a memory card is detected
The Import Dialogue

The Import window shows sources in the left panel. Typically, memory cards appear here but other drives will also be shown. Thumbnails in the centre so you can see what’s being imported. Settings including destinations are on the right. Right at the bottom of the window you’ll see Import Presets, where you can choose presets that you’ve previously saved.
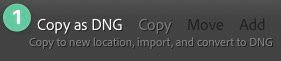
[1] I copy all camera RAW files as DNG files. This leaves the original image files on the memory card and creates a new DNG version.
You will find a lot of debate online about the best practice. I prefer to work with DNG files because that’s Adobe’s proprietary format and is arguably more future-proof.
However, I also save and archive all my original RAW files because, you know, belt and braces!
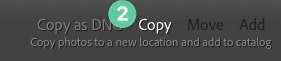
[2] Some cameras, including Leica models, create DNG files in the camera so it’s not necessary to create new files, I can copy the DNG files from the memory card.
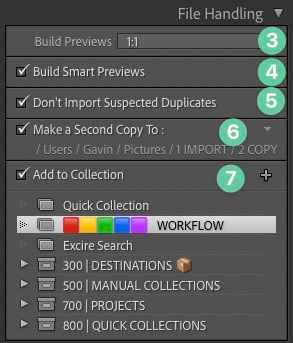
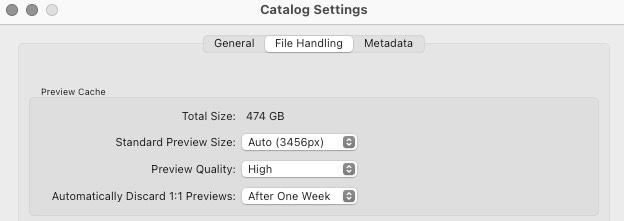
[3] I choose to Build full-size previews. Useful when editing because it allows us to zoom in to 100% without waiting for Lightroom to build the full-size version. The size of previews can be managed in Lightroom’s Catalogue Settings.
I set the Standard Preview Size to the dimensions of my monitor and set Preview Quality to High.
Previews can take up a lot of space so I recommend choosing to Automatically Discard them after one week.
[4] Smart Previews allow us to apply some edits to an image, even if the original file is not available, ie. When a storage device is disconnected. I rarely use Smart Previews but if you have space available, it can be helpful to build them at this point.
[5] Don’t Import Suspected Duplicates is rarely an issue because importing is generally a once-only process but better to have the option selected to avoid duplication.
[6] IMPORTANT! This option allows us to make a second copy of the original RAW files to a different location. Essentially, this is a complete copy of all the original files from our memory cards. These copies won’t be referenced in Lightroom.
Personally, I copy all my RAW files to an external drive and that drive is then backed-up to a cloud storage service. This ensures that ALL my images are safely stored locally and off-site. I might delete working files as go through the editing process but I’m never in danger of losing any original files. I’ll write more about back-up strategies in future editions.
[7] Finally, I add all imported files to the Collection where my editing workflow process begins. More on this process of using Collections to manage a workflow in future editions.
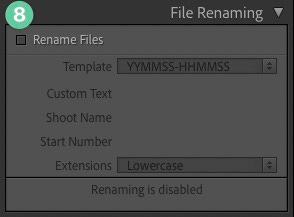
[8] I don’t rename files when importing because I have a naming methodology which creates long file names to include dates and locations e.g. a recently renamed file is 240519–132648-Switzerland-Saint-Saphorin-Gavin-Gough.DNG
Lightroom provides an option to build filenames based upon metadata, such as the creation date and time, country, location etc. As the files don’t yet contain this metadata, I don’t rename files when importing. Plus, renaming slow the process down.
[9] I don’t apply any Develop Settings when importing but I do apply a Metadata preset [10] containing my Copyright and Contract information to ensure that all files have this data embedded from the start.
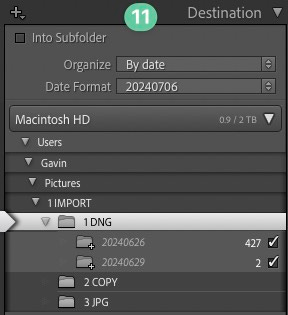
[11] Finally, I use the same import location for every import and use the Date to organise folders. However, this is a temporary location and after editing and processing new images, I give folders more meaningful names and move them to a permanent storage location.
Templates
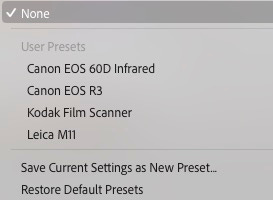
When we have all of the options set, I recommend saving them as a template. If you’re using different cameras, create one template for each camera if the import options vary. For example, my Canon EOS R3 preset creates new DNG files whilst my Leica M11 preset only copies the DNG files that already exist on the memory card.
If you have questions or comments, you’re welcome to join the Newsletter chat and I’ll do my best to answer.

In last week’s post (paid subscribers), I looked at the benefits of personal photo projects and shared images from a project in New York City.
Beyond the Frame 4/

All projects are personal, aren’t they? Well, they probably ought to be. The phrase “personal project” is typically used to describe a series of images made by a photographer when they’re not working on a paid commission. Rob Haggart, formerly a Director of Photography for Men’s Journal magazine runs the
