
Beyond the Frame 16/
How to photograph lightning and how to process photos of lightning in Lightroom Classic.

Lightning
“Thunder is good, thunder is impressive, but it is lightning that does the work.” — Mark Twain
Benjamin Franklin catching lightning in a bottle

In 1752, as an electrical storm built overhead, Benjamin Franklin performed a daring experiment. He tied a large house key to a string of wet hemp, attached the other end of the strong to a kite, gave the kite string to his son and, as lightning bolts crackled in the sky above, directed his son to stand a safe distance away.
“He charged phials, and from the electric fire thus obtained, he kindled spirits, and performed all other electrical experiments.”
No mention is made of the fate of Franklin’s son and he does not appear in West’s heroic painting — unless, as I suspect, the inevitable happened and he became one of those angelic cherubs!
Franklin’s experiment is where the phrase, “To catch lightning in a bottle” originates.
I am not going to suggest that you attempt to catch lightning in a bottle — and please do not fly a kite in a storm — but I will share some of my golden tips for catching lightning in a lens (see what I did there?)

Working in Nepal, I had the good fortune to stay in a hotel room with a view of the magnificent Bouddha Stupa. A storm built overhead but the flashes of lightning were frustratingly infrequent. I made dozens of frames but caught only two flashes of lightning. One was too far away to be of interest but the other single frame captured the moment when lightning shot through the sky above the stupa.
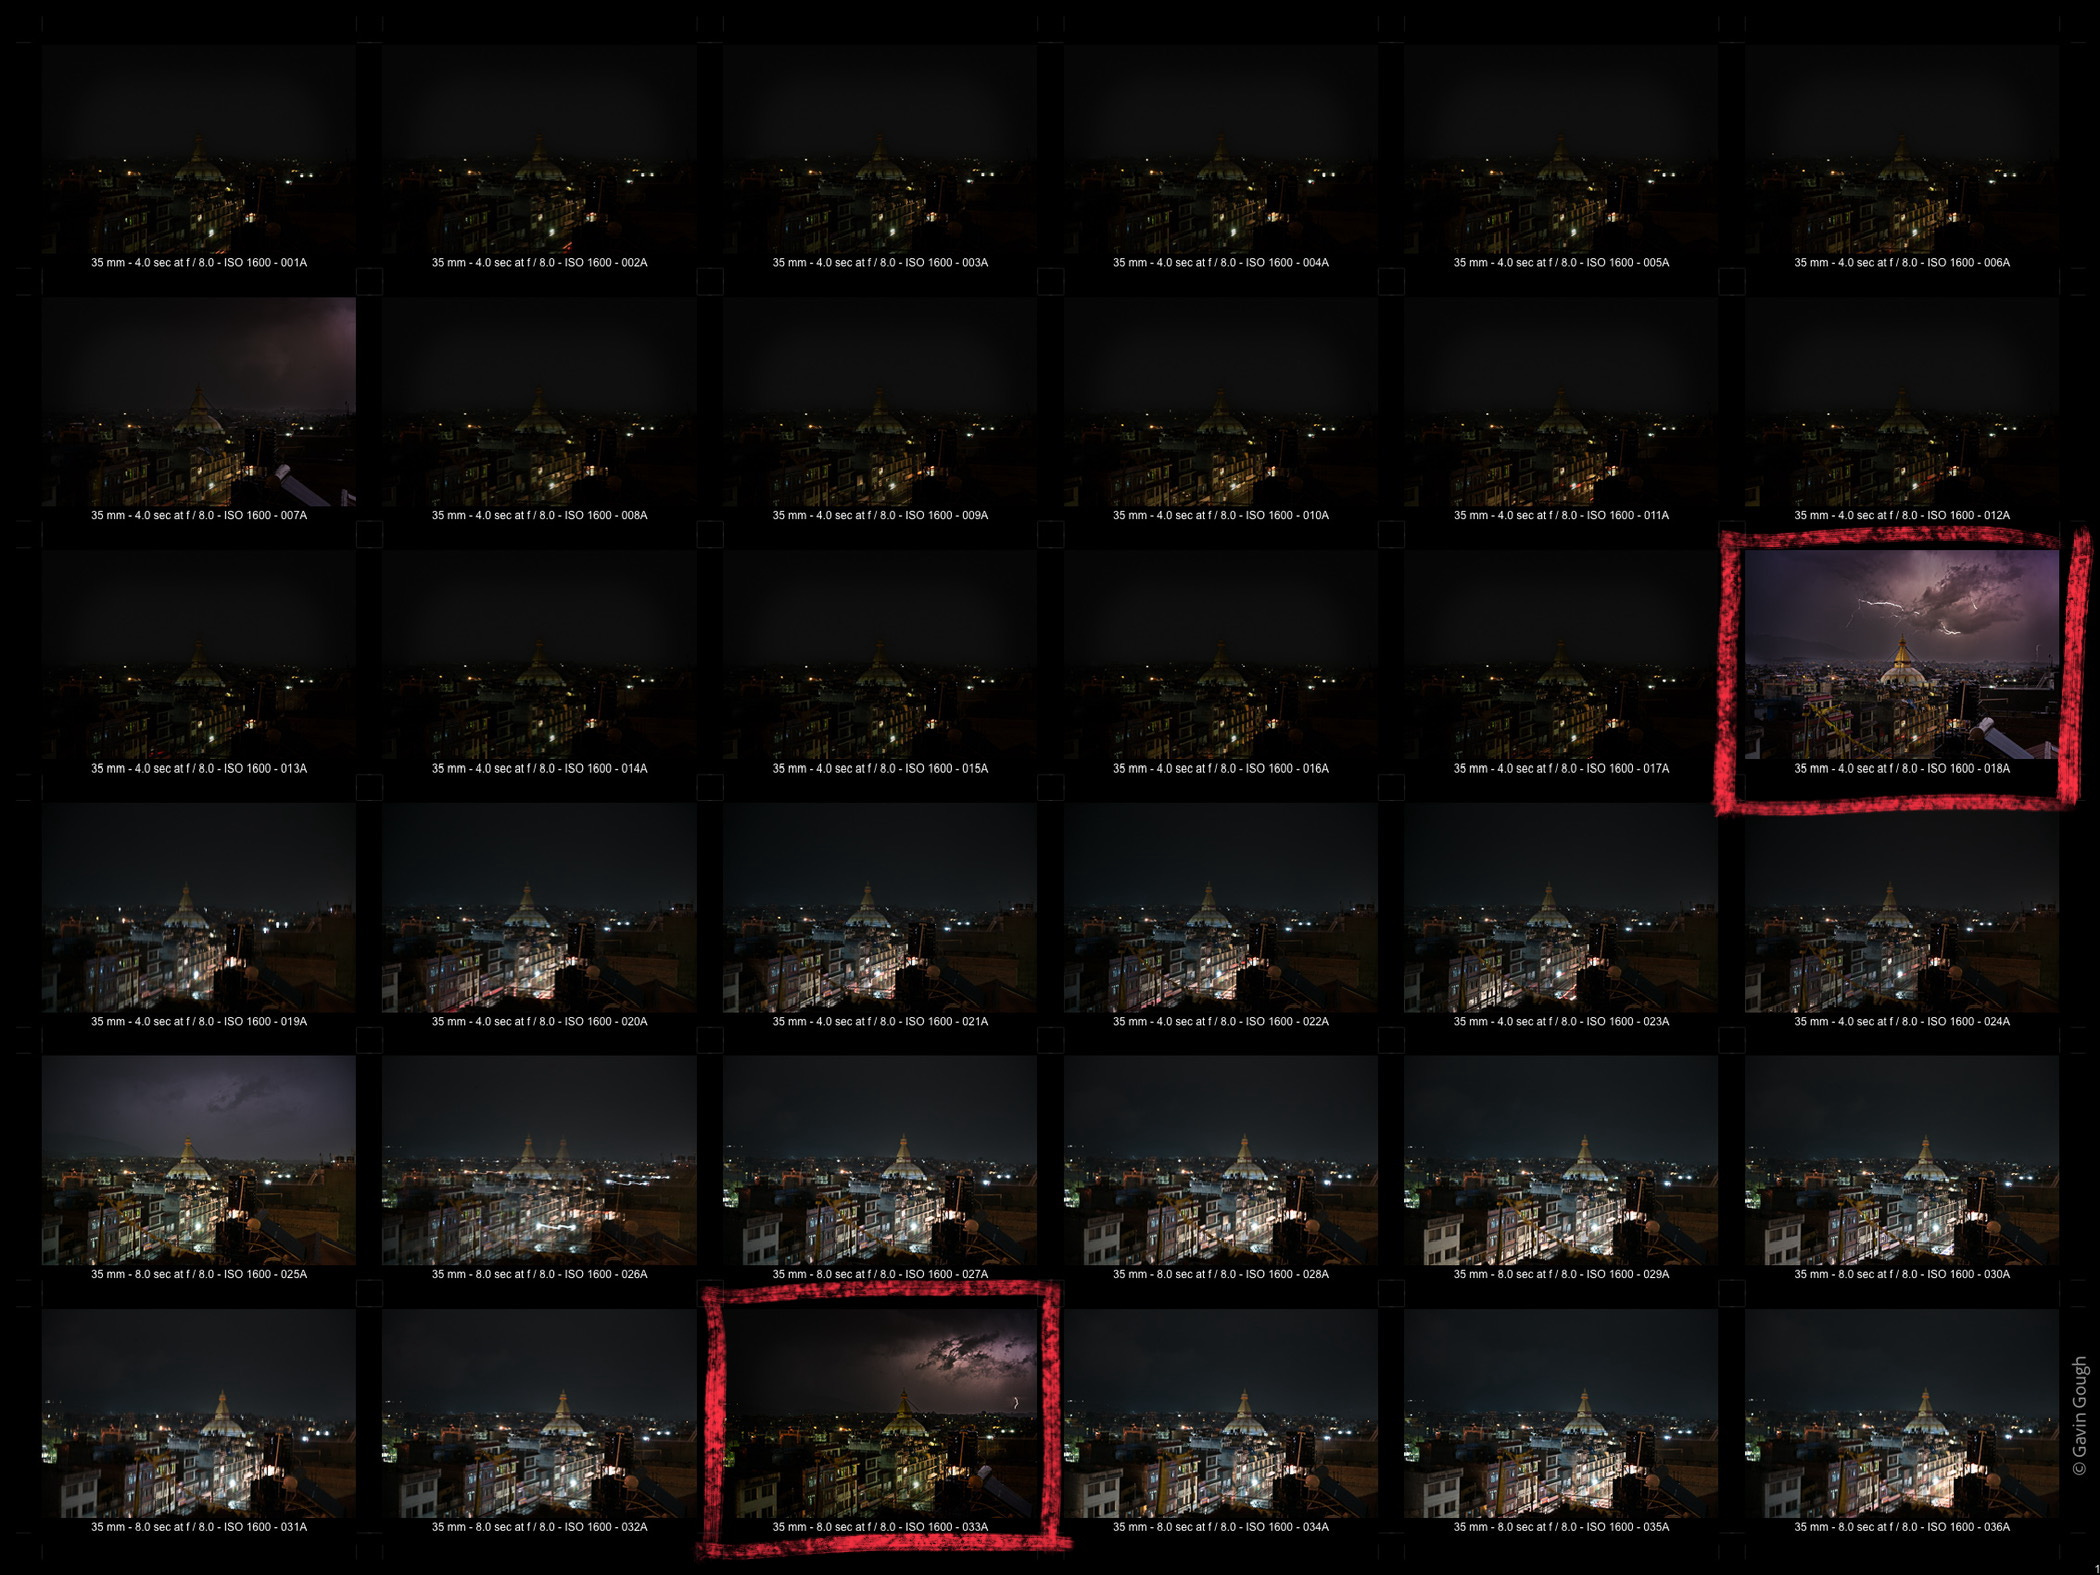
Had I set out with the intention of photographing lightning, I would have been better prepared and chosen a more appealing view. But that wasn’t my assignment. I didn’t have a tripod, the storm came and went in less than 45 minutes… But I think it’s a reasonable example of what can be achieved with the right camera settings.
Camera Settings

Although it’s obviously impossible to predict a flash of lightning, we can give ourselves the best chance of catching one by keeping the camera’s shutter open for as long as possible.
That’s the principle. Whilst the camera’s shutter is open, it’s always watching, waiting for the light.
You’ll potentially end up with dozens and dozens of very dark, underexposed images where lightning is entirely absent. But when lightning does strike, your camera will already be recording an image.
The camera should not be making any automatic adjustments. Avoid Auto-Focus, Aperture-Priority and Shutter-Priority.
I switch to manual exposure, dial in a loooong shutter speed (30 seconds is ideal), set a narrow aperture (>f/11), set a low ISO (50–200), manually focus to near infinity and wait.
The ambient light will influence these settings. Aim to significantly underexpose the scene because the extra illumination of the lightning will increase the exposure levels dramatically.
Ideally, the camera should be very stable, making a succession of long exposures.
Be safe. Follow the Met Office’s advice for staying safe in a storm (Asking your offspring to fly a kite with a wet hemp string is discouraged).
Use a tripod. The camera must be stable.
If a tripod isn’t available, set the camera on a solid base and use a remote shutter release. Try to avoid having to touch the camera to activate the shutter.
If you don’t have a remote release, set the camera on a solid base and use the delayed shutter release. Most cameras have a 2 second delay option.
If available, use an electronic shutter rather than a mechanical shutter to avoid camera shake from the shutter mechanism.
Set the shutter for continuous, repeated actuations.

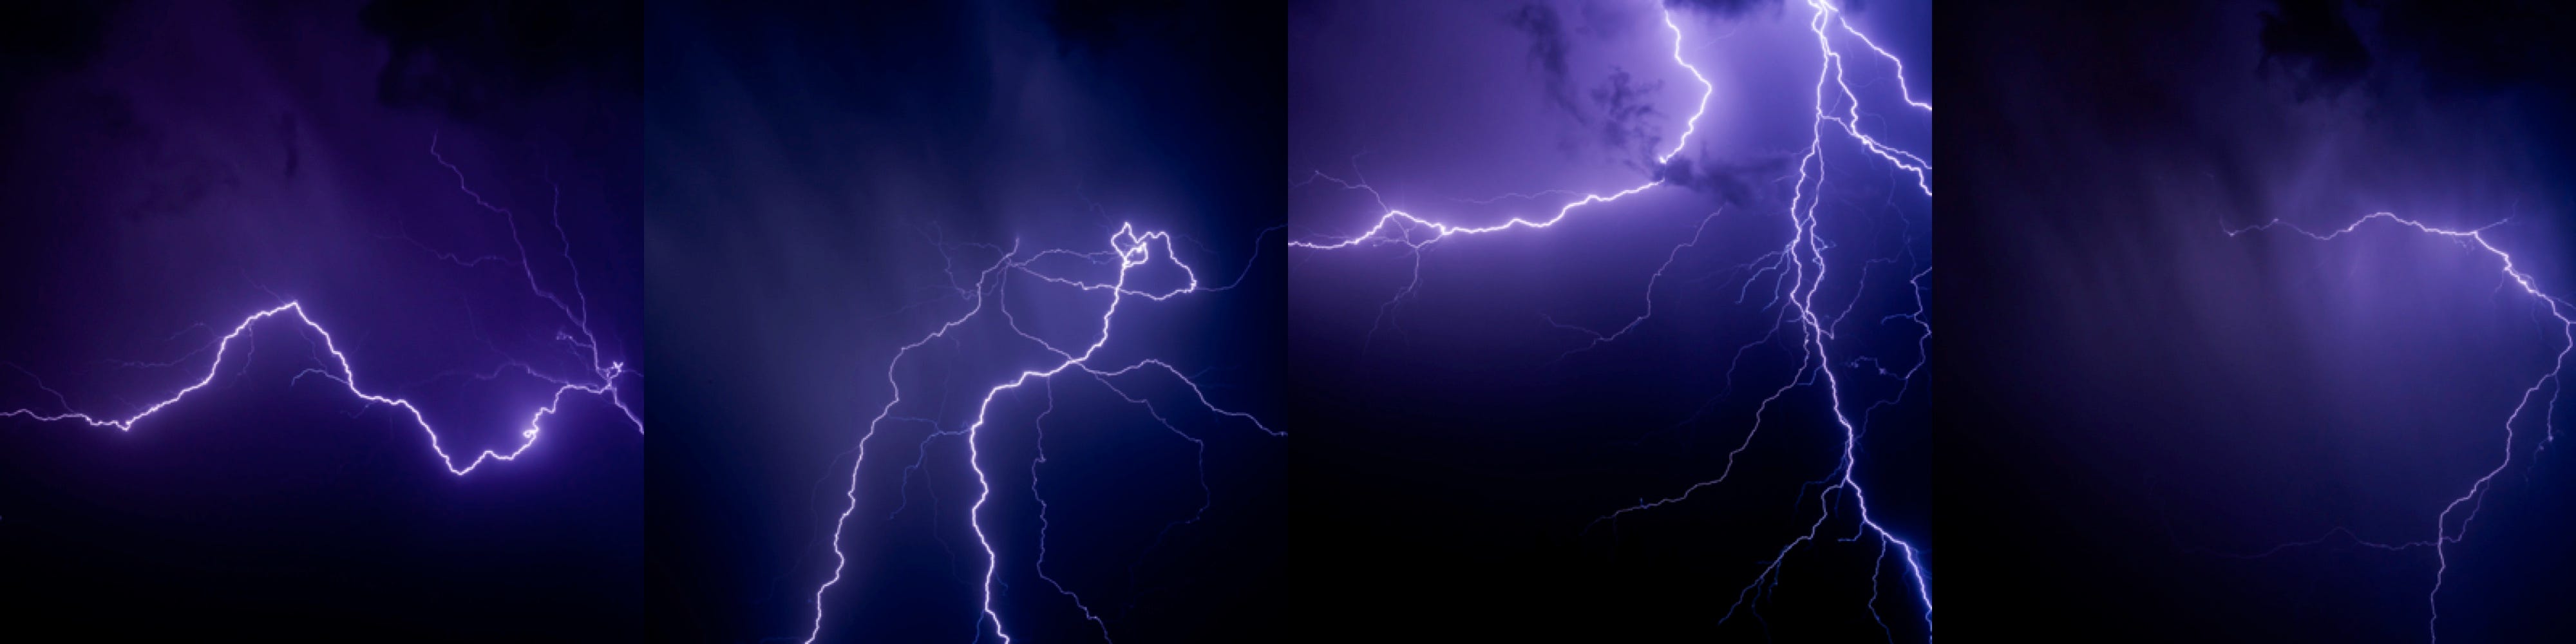
I took a gamble for this image of lightning above a building in Bangkok. I could see that the lightning often appeared around the top of skyscraper so switched to a telephoto lens and framed the building with space above it.
Electrical storms are common in Bangkok during the Rainy Season so there are plenty of opportunities to practice and the chances of framing a tighter crop on a lightning strike are improved.

Mid-summer in Cornwall and there was still a lot of ambient light in the sky during the Blue Hour. Consequently, even at the lowest ISO (50) and smallest aperture (f/22), a three-second exposure was the longest I could achieve without overexposing the sea and sky.

The storm was many miles away but the streaks of lightning on the horizon provided an unusual light show.

Processing Lightning Photos in Lightroom Classic
If you’re fortunate and manage to capture an image of lightning, the processing steps are not significantly different from those used for any other image. However, there are a few tweaks that will help you get the most from your image.
Bouddha Stupa Example

I should say that I’m not a fan of overly-dramatic effects. My old-fashioned approach comes from the age of the analogue darkroom, where image manipulation was pretty much limited to dodging and burning in order to reduce or increase exposure and contrast changes were dictated by different grades of photographic paper.
My philosophy is to try and keep my digital processing within the limitations afforded by darkroom processing. It’s arguably more precise in the digital space but the principles remain the same.
Global exposure adjustments (to the whole image)
Local exposure adjustments (dodging and burning specific areas)
Colour adjustments
Dust spot removal — I’ve spent many hours carefully painting over dust spots on analogue prints with special inks and a teeny-tiny brush.
Looking at the example of the photo I made in Nepal, these are the processing choices I made:
Lens Corrections
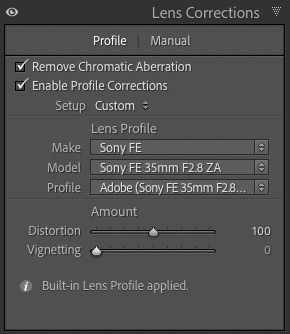
Always the first step in the process, activate the automatic lens correction.
I tend to disable the automatic vignette removal because I find that it can bring unwelcome noise into the edges of the frame and I’ll occasionally add a subtle vignette anyway, so it makes no sense to remove it here only to add it later.
I see that I made this image with a tiny, Sony 35mm “pancake” lens. This little lens is available on B&H for only $598, which just goes to prove that the performance of some of the relatively inexpensive prime lenses is outstanding.

Basic
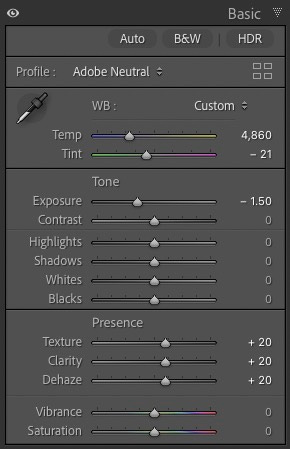
Profile: Adobe Neutral
I typically use custom profiles built with a colour calibration tool but for this image I wanted to start with flatter, more neutral contrast.White Balance
The camera’s Auto White Balance gave a much more blue/grey white balance than the scene appeared. I moved the Temp slider from 3,650 to 4,860 and didn’t alter the Tint level.Tone: Exposure = -1.5 stops
Even though I’d underexposed in the camera, the resulting file was still much lighter than the scene looked in reality so I dropped the exposure by one-and-a-half stops. Other than that, it wasn’t necessary to make any further exposure adjustments. I tend to use the Tone Curve to adjust shadows and highlights.Dehaze is a really useful tool, especially for scenes like this.
Clarity is helpful too but I resist the temptation to move the sliders too far. Even though the sliders extend to -100 and +100, if you’re moving any slider beyond plus or minus 20, you’ve probably gone too far.
Tone Curve
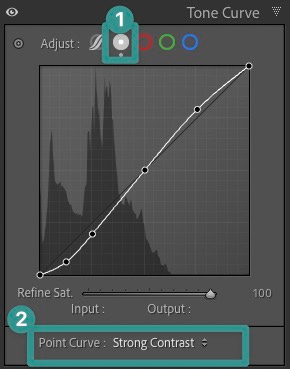
I use the Point Curve option to adjust specific points along the Tone Curve. I find it offers greater control than the default Parametric Curve option.
I have a few Tone Curves saved as presets. Light, Medium and Strong curves provide a good starting point for tonal adjustments and they’re often all that’s needed.
Vignette

I rarely add vignettes but it seemed appropriate to darken the edges of the frame in this image. I use the Paint Overlay style rather than the default Highlight Priority.
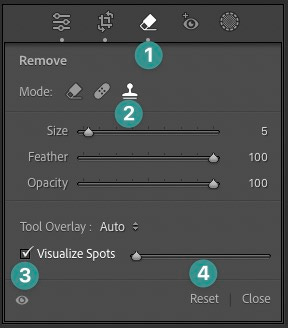
Dust Spots
Finally, when you’re making very long-exposure images where you’re likely to boost the contrast, you’re going to find evidence of dust on the camera’s sensor.

The Clone Tool
Select the Remove tool in the Develop module (Keyboard shortcut = q)
Select the Clone stamp
Click on Visualise Spots to display a high-contrast, monochrome version of the image
Adjust the slider to reveal more dust spots
You can alter the size, feathering and opacity of the Clone stamp and then simply click on the offending dust spot. Lightroom will clone from a similar part of the image. The Clone stamps can be moved and adjusted afterwards.

Summary
That’s pretty much it. I didn’t make any other colour or tone adjustments. The Colour Mixing and Colour Grading panels remained unchanged and the image didn’t require any additional sharpening.
Getting the exposure (almost) right in the camera will produce a good quality RAW file and the processing adjustments required are minimal. I’d rather be making photos than processing them, which is one of the reasons my digital workflow is pretty low-maintenance.
If you have any comments or questions about photographing or processing lightning photos, please feel free to ask. And if you have any lightning photos to share, I would love to see them.
I have a fanciful notion of joining those storm-chasers in the United States who drive around looking for extreme weather conditions to photograph. It’s probably an idea that’s more appealing in the imagination than it is in reality. Anyway, if you’re hankering for more photographs of lightning, I found this collection in Arizona.

Beyond the Frame 15/

For the love of the Zine. An elusive pink tram. Plus news of “Foto”, a new photo-sharing platform dedicated to photographers’ interests.


Thank you Gavin. With storms becoming increasingly frequent in this part of Europe in the summer these days, I look forward to the next one!