
Mumbai Panning and Lightroom Tips – Beyond the Frame 12/
Slow shutter-speeds at Mumbai Railway Station and an essential Lightroom Identity Plate hack.

Chhatrapati Shivaji Terminus
(Mumbai Railway Station)

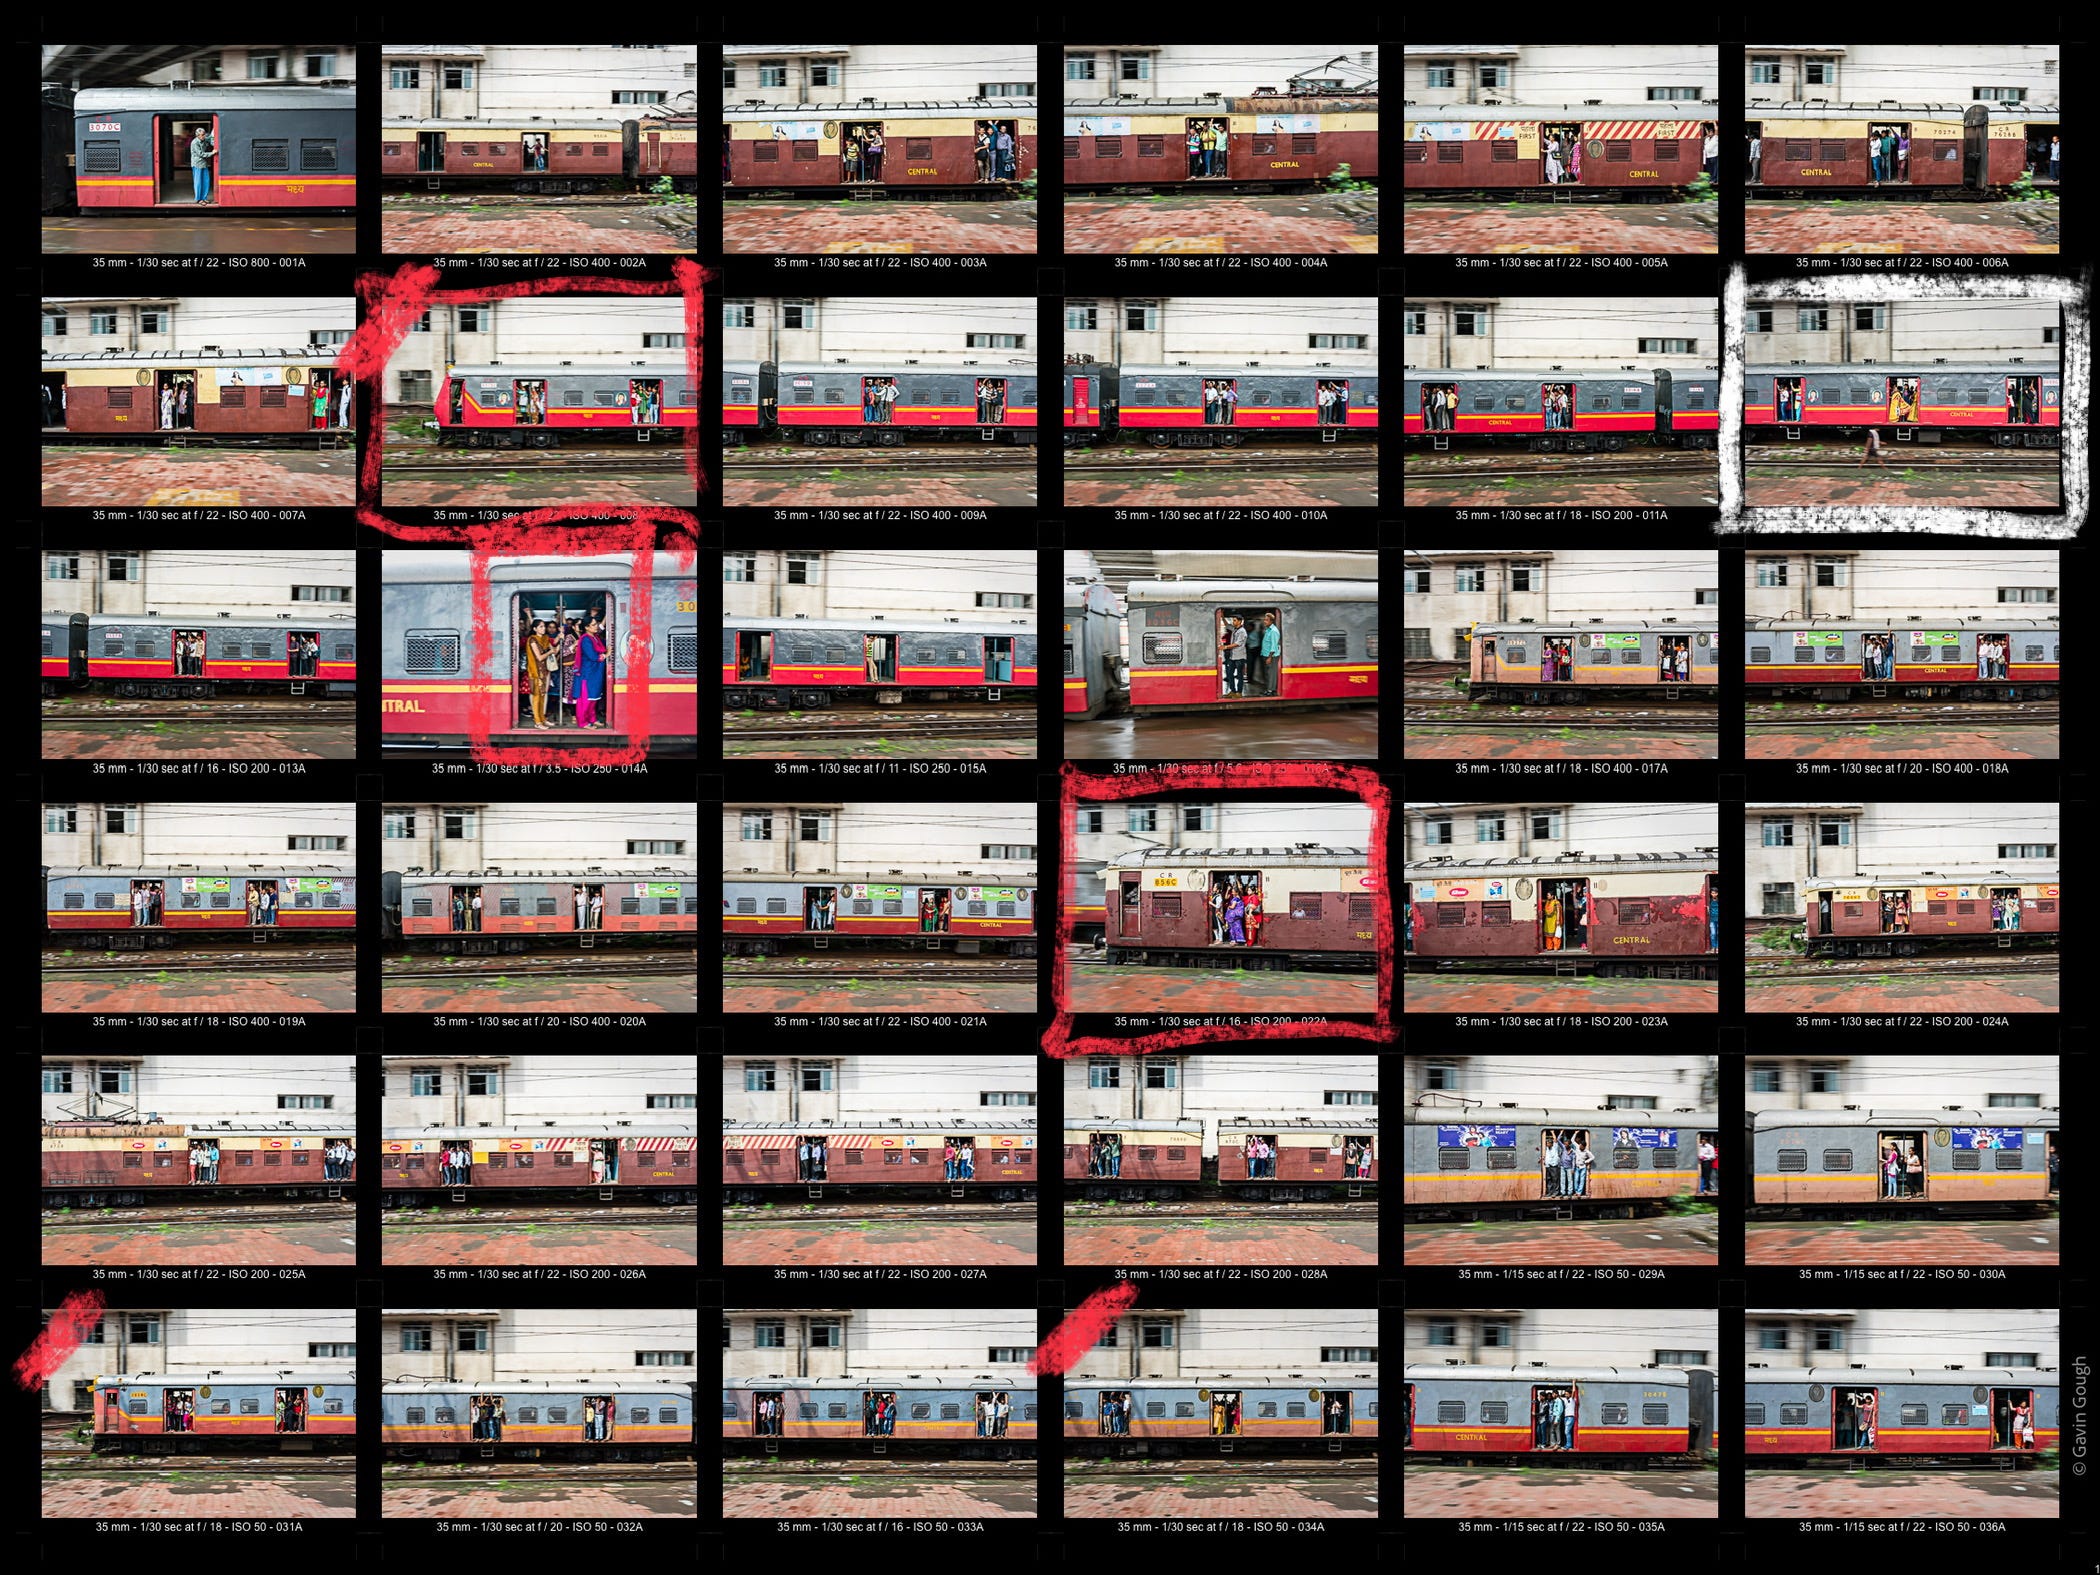
On assignment in India, I was photographing Mumbai Railway Station, one of the busiest railway stations in India.
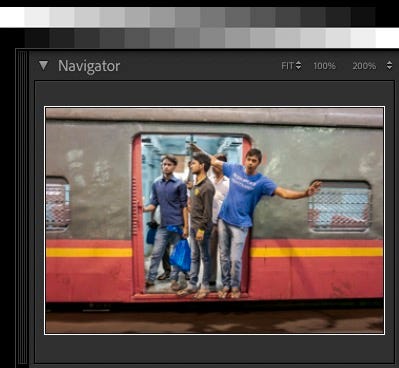
As part of the photo essay, I wanted to make at least one image showing passengers framed in the open doorway of a moving carriage.

Trains are constantly arriving and leaving. Doors that close are considered an inconvenience on many trains in India. Consequently, people standing in the doorways are clearly visible and I like the combination of passengers, relatively sharp, against the movement of the train carriages.

Panning
With a slow shutter speed, I “pan” the camera from side-to-side during the exposure. The aim is to match the speed of the train. When you get it right, the subject will render sharply against a blurred background.

It’s not an easy skill to master but practice makes perfect and I’ve developed some useful techniques.
I position my feet towards the direction that I want to end the panning movement. My body then naturally swings back to facing “forward” and I’m not pushing myself to twist awkwardly.
I’ve tried setting the camera to take multiple, fast frames in quick succession. This rarely works. For me, it’s more effective to make one frame for each panning movement.
Like any good tennis or cricket coach will teach you, the follow-through is crucial. The movement must be one smooth swivel. Don’t stop when you press the shutter.
Practice without pressing the shutter. Because our instinct is to try and keep the camera as still as possible, it’s natural to stop. I make a few “practice swings” without releasing the shutter, which helps override that instinct.

Camera Settings
All of these images were made at 1/30th of a second. When making images where I’m showing movement, I’ll switch the camera to Shutter Priority mode, dial-in 1/15th or 1/30th and allow the camera to evaluate the light and set an appropriate aperture and ISO automatically.

Depth-of-field isn’t a big consideration where part of the image is purposely blurred so whether the camera selects f/2 or f/22 makes little difference.

A couple of caveats:
Most cameras have a setting to control the ISO range when Auto ISO is set. More recent models have advanced to reduce noise at higher ISO levels to impressive levels. Nevertheless, I’ll set the Auto ISO range to 200–6400. Anything above that is likely to be too noisy.
Any camera can be thrown off by scenes where there’s a lot of variation in light levels. For this type of movement photo, I’m generally placing the subject in the centre of the frame and I’ve found that using centre-weighted metering produces the most consistent results.
Chhatrapati Shivaji Terminus is a location that you might recognise from the film Slumdog Millionaire and the song Jai Ho.
Lightroom Identity Plate Hack

Using a properly colour-calibrated monitor is crucial for a consistent workflow. I have a BenQ monitor in my office, which I use whenever possible. On location, however, I’m using a MacBook Pro, which is adequate for quick edits and processing when a deadline is looming.
Even though my MacBook Pro is calibrated, lighting conditions vary enormously. Dimly-lit hotel rooms and sunlit, street side cafes are typically the two extremes. I also find that the varying angle of the Mac’s screen can create inconsistencies.

So I created a way to very quickly double-check that I can see a full range of tones on my screen. Using the option to create a custom Identity Plate in Lightroom, I insert a greyscale chart, showing 16 or 21 shades.

The charts are simple to install and easy to use.
You can download the greyscale charts and find installation instructions here:
The trick is to adjust the screen brightness and position the angle of the screen so that the different shades are distinguishable.
It should be possible to see the difference between absolute black and the next shade. Similarly, there should be visible contrast between white and the next lightest shade.
(If you’re unable to differentiate between the darker shades as you read this, you might want to check your monitor calibration!)
Obviously, if you’re unable to see the difference in shades, you can’t accurately judge tonal contrast in the images you’re processing.
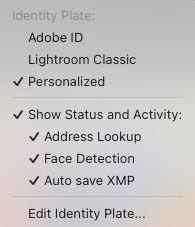
Whilst you’re adjusting Identity plate settings, you might also find it useful to turn on the Status and Activity settings. You’ll see the progress of any updates Lightroom is making in the background.
This is one of a series of posts that will continue to build into a comprehensive workflow guide.
If there any specific aspects of Lightroom that you would like me to cover, please let me know.

Beyond the Frame 11/

Still images, we know, preserve moments in time. That’s their appeal. Photographs remind us how something looked at a particular time in a particular place. They breathe life into moments lost to the past.
